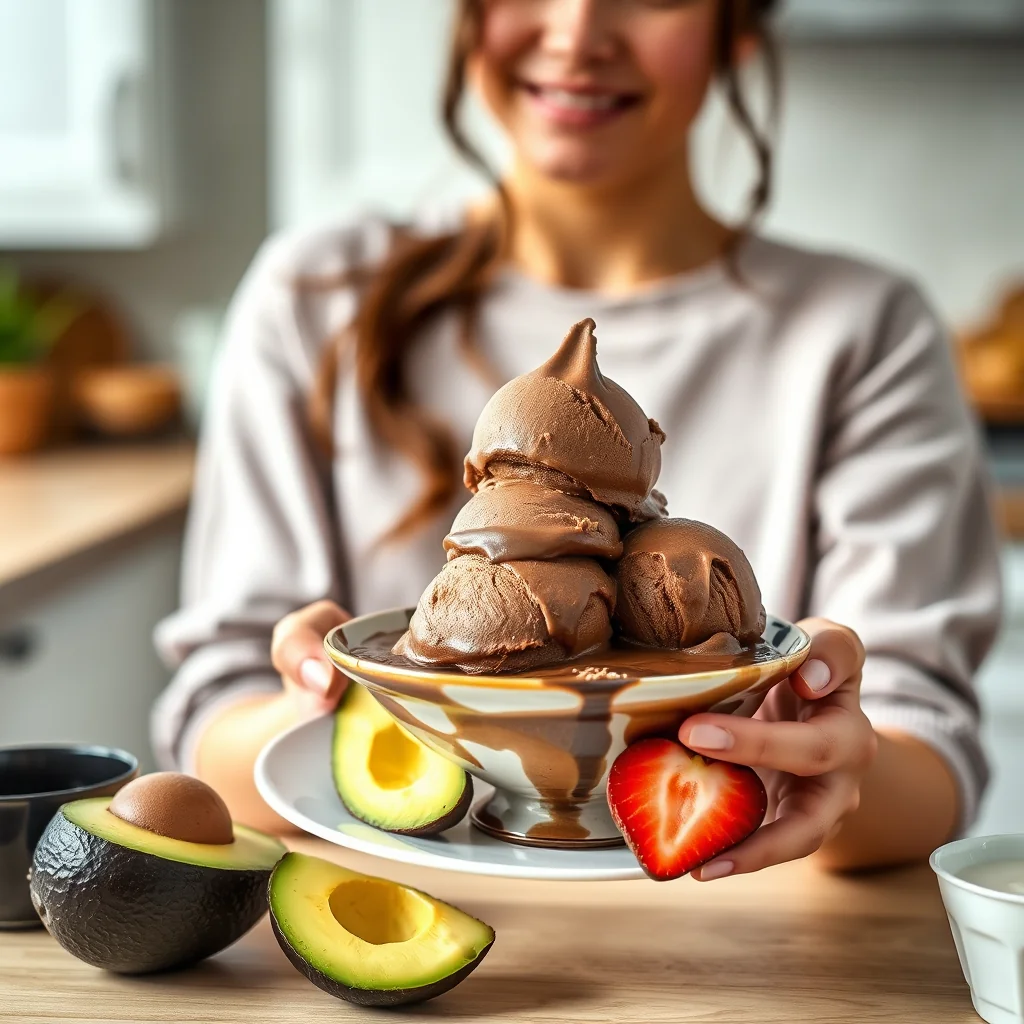
The creamiest, dreamiest chocolate ice cream (with a secret!) gets its unbelievable body from ripe avocado, and nobody at the table will ever guess. Blended with coconut milk, cocoa, and chopped baking chocolate, the base churns into a dark, fudgy scoop with zero avocado taste. It's the kind of dessert that makes a keto diet feel like a reward.
The Creamiest, Dreamiest Chocolate Ice Cream (With a Secret!)
Get ready to have your mind blown! This isn’t just any chocolate ice cream. Our secret ingredient, creamy avocado, creates an unbelievably smooth and luscious texture without any of the avocado taste. It’s a rich, decadent, and totally guilt-free dessert packed with healthy fats and deep chocolate flavor. Perfect for satisfying those sweet cravings while staying on track, this keto-friendly treat will become your new go-to for impressing guests or just treating yourself.
Ingredients
• 2 large ripe avocados, pitted and peeled
• 1 cup / 240 ml full-fat coconut milk
• ½ cup / 120 ml (4.1 fl oz) heavy whipping cream
• ½ cup / 50 g (1.76 oz) unsweetened cocoa powder
• 2 tsp / 10 ml vanilla extract
• ½ cup / 80 g (2.82 oz) powdered erythritol
• 25 drops liquid stevia, or to taste
• 1.5 oz / 42 g unsweetened baking chocolate, chopped
Instructions
1. Directions
2. Create the creamy base. In a high-speed blender or a large bowl with an immersion blender, combine the avocado flesh, coconut milk, heavy cream, and vanilla extract. Blend until completely smooth with no lumps.
3. Add the flavor. Add the powdered erythritol, liquid stevia, and cocoa powder to the blender. Mix again until everything is fully incorporated and the mixture is rich and dark.
4. Fold in the chocolate. Transfer the mixture to a bowl and stir in the chopped unsweetened baking chocolate pieces.
5. Chill thoroughly. Cover the bowl and place it in the refrigerator to chill for at least 6 hours, or preferably overnight. This step is crucial for a creamy result.
6. Churn the ice cream. Remove the base from the fridge 20 minutes before serving. Pour the chilled mixture into your ice cream maker and churn according to the manufacturer’s until it reaches a thick, soft-serve consistency.
7. Serve or store. Enjoy immediately or transfer to a freezer-safe container and freeze for 2-3 hours for a firmer, scoopable ice cream.
Nutritional Information
• Nutritional Info
• Serves: 6
• Calories per Serving: 240
• Fat: 22g
• Net Carbs: 4g (0.14 oz)
• Protein: 4g
Pro Tips for Success
• Use very ripe, soft avocados for the creamiest texture and to ensure there is no detectable avocado flavor.
• For a stracciatella-style ice cream, melt the baking chocolate and slowly drizzle it into the ice cream machine during the last minute of churning.
• Don’t skip the chilling step! A thoroughly cold ice cream base churns faster and prevents the formation of ice crystals, resulting in a much smoother final product.
FAQ
Q: Will this keto ice cream taste like avocado
A: No, you won’t taste the avocado at all! When you use very ripe, soft avocados, their mild flavor is completely masked by the rich cocoa powder and vanilla, leaving only a creamy, luscious texture.
Q: Can I make this chocolate ice cream without an ice cream maker
A: Yes, you can make a no-churn version. After chilling the base, transfer it to a freezer-safe container. Freeze for 4-6 hours, stirring vigorously every 45-60 minutes to break up ice crystals and keep it creamy.
Q: How can I make this a dairy-free chocolate ice cream
A: To make this recipe completely dairy-free, simply substitute the heavy whipping cream with an equal amount of chilled, full-fat coconut cream (the thick part from a can of coconut milk). This will maintain the rich, creamy consistency.
Q: Why is it important to chill the ice cream base
A: Chilling the base for at least 6 hours is a crucial step. A thoroughly cold mixture churns faster and more evenly, which prevents large ice crystals from forming and results in a significantly smoother, creamier final product.
Pro Tips for Success
- Use very ripe, soft avocados — they blend completely smooth and guarantee there's no detectable avocado flavor in the finished ice cream.
- Don't skip the chilling step: the base needs at least 6 hours in the fridge, preferably overnight. A thoroughly cold base churns faster and prevents ice crystals.
- For stracciatella-style flecks, melt the baking chocolate and drizzle it slowly into the machine during the last minute of churning instead of folding in solid pieces.
- Take the base out of the fridge about 20 minutes before churning so it flows freely through the machine without overtaxing the motor.
- Serve it straight from the churn for soft-serve texture, or freeze 2-3 hours in a freezer-safe container for firmer, scoopable ice cream.
Frequently Asked Questions
Can I make this chocolate ice cream without an ice cream maker?
Yes — freeze the chilled base in a shallow dish and whisk it every 30 minutes to break up ice crystals. It takes patience but still ends up creamy.
Can I taste the avocado?
Not at all, as long as the avocados are very ripe and you blend the base completely smooth. The cocoa and chocolate cover it entirely.
How long does it keep in the freezer?
About a week in an airtight freezer container before the texture starts to firm up. Let it sit 5-10 minutes before scooping.
Is this ice cream keto-friendly?
Yes — each serving has 4 g net carbs, 22 g fat, and 4 g protein, with sweetness from erythritol and stevia instead of sugar.
Recipe card below.
The Creamiest, Dreamiest Chocolate Ice Cream (With a Secret!)
Ingredients
Method
- Directions
- Create the creamy base.
- In a high-speed blender or a large bowl with an immersion blender, combine the avocado flesh, coconut milk, heavy cream, and vanilla extract.
- Blend until completely smooth with no lumps.
- Add the flavor.
- Add the powdered erythritol, liquid stevia, and cocoa powder to the blender.
- Mix again until everything is fully incorporated and the mixture is rich and dark.
- Fold in the chocolate.
- Transfer the mixture to a bowl and stir in the chopped unsweetened baking chocolate pieces.
- Chill thoroughly.
- Cover the bowl and place it in the refrigerator to chill for at least 6 hours, or preferably overnight. This step is crucial for a creamy result.
- Churn the ice cream.
- Remove the base from the fridge 20 minutes before serving.
- Pour the chilled mixture into your ice cream maker and churn according to the manufacturer’s until it reaches a thick, soft-serve consistency.
- Serve or store.
- Enjoy immediately or transfer to a freezer-safe container and freeze for 2-3 hours for a firmer, scoopable ice cream.
- Don't skip the chilling step! A thoroughly cold ice cream base churns faster and prevents the formation of ice crystals, resulting in a much smoother final product.