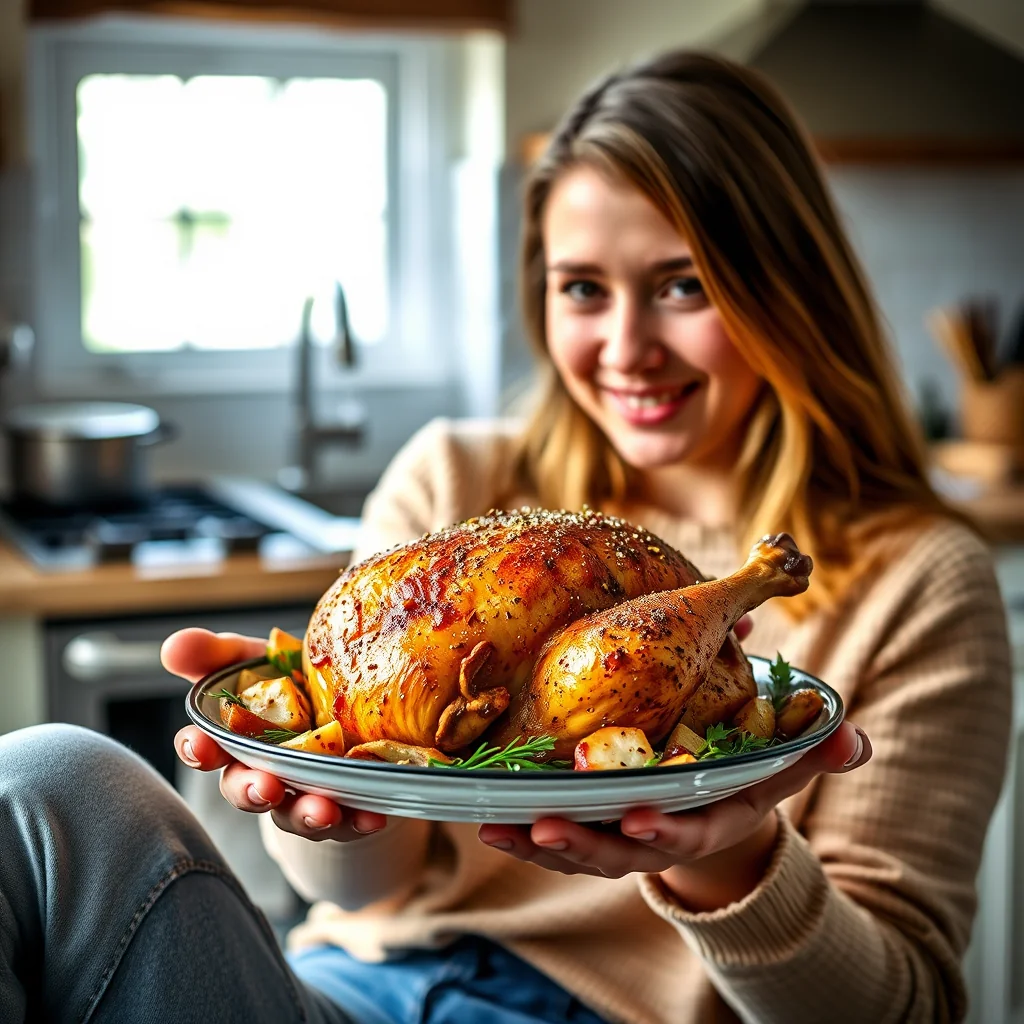
Simple cast iron roast chicken proves that the best meals need the fewest moving parts. A dry-brined bird meets a screaming-hot cast-iron skillet, and the skin turns shatteringly crisp while the meat stays succulent. Salt, pepper, and a little olive oil are all it takes.
Forget complicated recipes! This cast iron roast chicken is the epitome of simple elegance. By dry-brining the chicken overnight and roasting it in a preheated skillet, you’ll achieve unbelievably crispy skin and succulent, flavorful meat every single time. It’s the kind of show-stopping meal that feels gourmet but is secretly effortless. Get ready for your new favorite way to roast a chicken!
Ingredients
• What You’ll Need
• 1 5-pound / 2.3 kg (5.07 lb) fryer chicken
• 2 teaspoons / 12 g kosher salt
• 1 teaspoon / 2 g (0.07 oz) coarsely ground black pepper
• 2 teaspoons / 10 ml (0.3 fl oz) olive oil
• Minced fresh thyme or rosemary, for garnish (optional)
Instructions
1. How to Make It
2. Pat the chicken completely dry with paper towels. Generously rub the entire outside of the chicken with the kosher salt and pepper. Place the chicken on a wire rack set inside a rimmed baking sheet and refrigerate, uncovered, overnight. This step is crucial for crispy skin!
3. When ready to cook, place a 12-inch cast-iron skillet in the oven and preheat to 450°F / 232°C. Let the chicken sit at room temperature while the oven and skillet preheat for at least 15 minutes.
4. Place the chicken on a work surface, neck side down. Using kitchen shears, carefully cut through the skin where the legs connect to the body. Firmly press down on the thighs to pop the hip joints, allowing the legs to lie flat for more even cooking.
5. Using oven mitts, carefully remove the hot skillet from the oven. Place the chicken in the skillet, breast side up, and press the legs down to ensure good contact. Brush the skin all over with olive oil. Return to the oven and roast for 40-50 minutes, or until an instant-read thermometer inserted into the thickest part of the thigh registers 165°F / 74°C.
6. Carefully remove the chicken from the oven and let it rest in the skillet for 10-15 minutes before carving. This allows the juices to redistribute. Garnish with fresh herbs, if using, just before serving.
Nutritional Information
• (per serving)
• Calories: 405 kcal
• Protein: 44 g
• Fat: 24 g
Pro Tips
• for Success
• The key to crispy skin is a very dry bird. Pat it thoroughly with paper towels before salting.
• Do not skip preheating the cast-iron skillet. Searing the chicken skin on contact is what creates that incredible crust.
• An instant-read thermometer is your best friend. Cooking to temperature (165°F (74°C) in the thigh) is far more reliable than cooking to time.
• Letting the chicken rest is non-negotiable. Carving too early will result in a dry bird and a puddle of lost juices on your cutting board.
FAQ
Q: Why do I need to dry brine the chicken overnight
A: Dry brining the chicken by salting it and leaving it uncovered in the refrigerator overnight is the most crucial step for achieving unbelievably crispy skin. This process draws out excess moisture from the skin, ensuring it gets golden brown and perfectly crisp in the oven.
Q: Can I skip preheating the cast iron skillet
A: No, you should not skip preheating the skillet. Placing the chicken in a preheated hot skillet immediately sears the skin on contact. This is essential for creating the incredible crust and locking in the juices.
Q: Is it really necessary to let the chicken rest after roasting
A: Yes, letting the chicken rest for 10-15 minutes is a non-negotiable step. This allows the juices to redistribute throughout the meat. If you carve it too early, the juices will run out, resulting in a dry chicken.
Q: How do I know when the chicken is perfectly cooked
A: The most reliable way to know if your chicken is done is by using an instant-read thermometer. The recipe is complete when the thermometer, inserted into the thickest part of the thigh without touching bone, registers 165°F / 74°C. Cooking to temperature is more accurate than cooking to time.
Pro Tips
- Dry-brine the chicken overnight, uncovered, on a rack in the fridge. This step is the single biggest factor in getting truly crispy skin.
- Preheat the cast-iron skillet in the oven along with the oven itself. The chicken sears on contact as it lands, which is what builds that incredible crust.
- Press the legs down after popping the hip joints so the bird sits flat and cooks evenly. A level chicken means the dark meat and breast finish at the same time.
- Cook to temperature, not time: 165°F (74°C) in the thickest part of the thigh. Grills and ovens vary, but an instant-read thermometer never does.
- Rest the chicken in the skillet for 10-15 minutes before carving. Carving early dumps the juices onto the board and leaves you with dry meat and a sad, salty bird.
Frequently Asked Questions
Why dry-brine the chicken overnight?
The uncovered fridge rest dries out the skin so it crisps instead of steams, while the salt seasons the meat through. It's the difference between good chicken and unforgettable chicken.
Do I really need a cast-iron skillet?
Cast iron holds the heat needed for the initial sear, but any heavy oven-safe skillet works. The key is preheating it thoroughly before the chicken goes in.
How do I know when the roast chicken is done?
An instant-read thermometer in the thickest part of the thigh should register 165°F (74°C). That's far more reliable than a timer, which can't account for bird size.
Is this roast chicken keto-friendly?
Perfectly. Each serving has 0g carbs with 44g protein and 24g fat, from just chicken, salt, pepper, and a touch of olive oil. It suits even strict keto.
Recipe card below.
More Recipes You’ll Love
- Sweet Coconut Lamb Shoulder (Pressure Cooker)
- Slow Cooker Boeuf Bourguignon (Keto-Friendly)
- Cheesy Baked Tofu Casserole (Keto-Friendly)
Simple Cast Iron Roast Chicken
Ingredients
Method
- How to Make It
- Pat the chicken completely dry with paper towels. Generously rub the entire outside of the chicken with the kosher salt and pepper.
- Place the chicken on a wire rack set inside a rimmed baking sheet and refrigerate, uncovered, overnight. This step is crucial for crispy skin!
- When ready to cook, place a 12-inch cast-iron skillet in the oven and preheat to 450°F / 232°C.
- Let the chicken sit at room temperature while the oven and skillet preheat for at least 15 minutes.
- Place the chicken on a work surface, neck side down.
- Using kitchen shears, carefully cut through the skin where the legs connect to the body. Firmly press down on the thighs to pop the hip joints, allowing the legs to lie flat for more even cooking.
- Using oven mitts, carefully remove the hot skillet from the oven.
- Place the chicken in the skillet, breast side up, and press the legs down to ensure good contact.
- Brush the skin all over with olive oil. Return to the oven and roast for 40-50 minutes, or until an instant-read thermometer inserted into the thickest part of the thigh registers 165°F / 74°C.
- Carefully remove the chicken from the oven and let it rest in the skillet for 10-15 minutes before carving. This allows the juices to redistribute.
- Garnish with fresh herbs, if using, just before serving.
- Do not skip preheating the cast-iron skillet.
- Searing the chicken skin on contact is what creates that incredible crust.
- Letting the chicken rest is non-negotiable. Carving too early will result in a dry bird and a puddle of lost juices on your cutting board.