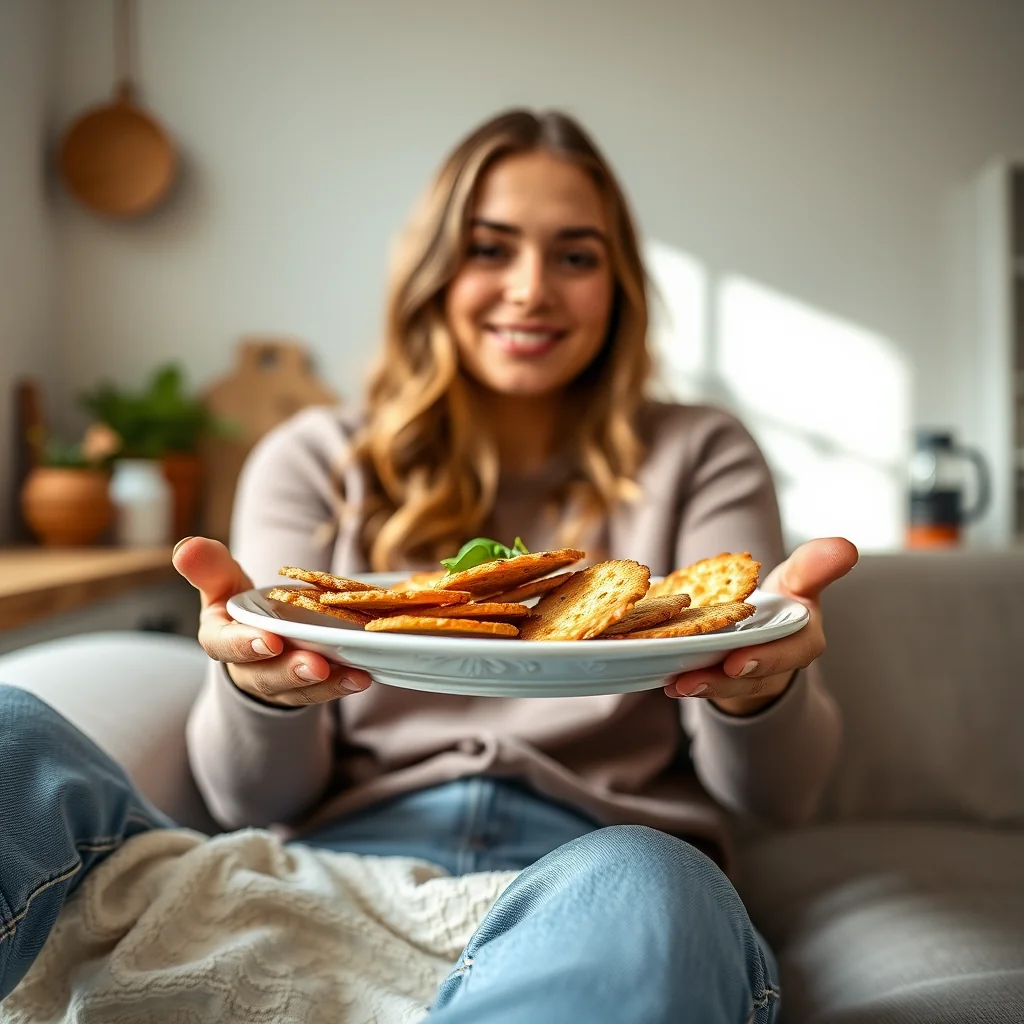
Easy keto cheese crisps turn a simple pile of shredded cheddar into lacy, crunchy, snackable gold in under 15 minutes. They are the salty, crunchy answer to a potato chip craving, with barely a carb in sight. Eat them straight off the pan, crumble them over salads, or use them to scoop up your favorite dip.
The Easiest, Cheesiest, Crunchiest Snack!
Are you ever hit with a sudden, intense craving for something salty, crunchy, and cheesy? I know I am! When that craving strikes, these lacy cheese crisps are my absolute go-to lifesaver. Made with just one (or two!) ingredients, they transform from a simple pile of shredded cheese into a delicate, crispy, and utterly addictive snack in under 15 minutes. They’re the perfect low-carb, keto-friendly answer to potato chips and are incredible crumbled over a salad, used to scoop up your favorite dip, or just devoured straight from the baking sheet. Get ready to meet your new favorite snack!
Ingredients
• 1 cup / 113g (4 oz) shredded sharp cheddar cheese
• 1 tablespoon / 7g (0.25 oz) seasoning of choice, optional (Italian seasoning, everything bagel seasoning, or smoked paprika work well)
Instructions
1. Preheat your oven to 375°F / 190°C. Line a large baking sheet with parchment paper for easy cleanup.2. Drop heaping tablespoons of the shredded cheese onto the prepared baking sheet, leaving at least 2 inches of space between each mound to allow for spreading. If using, sprinkle your favorite seasonings evenly over the cheese piles.3. Bake for 12-14 minutes, or until the edges are golden brown and the centers are bubbly and set. Keep a close eye on them during the last few minutes as they can go from perfect to burnt very quickly!4. Let the crisps cool on the baking sheet for a few minutes. They will become firm and crispy as they cool. Once cool, carefully lift them off the parchment paper and enjoy immediately for the best texture.
Nutritional Information
• Yield: 2 servingsServing Size: 1Amount Per Serving:Calories: 228kcalFat: 19gProtein: 14gNet Carbs: 1gThis is an estimated nutritional analysis and may vary.
Pro Tips
• & Tricks
• Experiment with different hard, aged cheeses like Parmesan, Asiago, or Gruyère for unique flavor profiles. Avoid soft cheeses as they won’t crisp up properly.
• To create mini taco shells or bowls, drape the hot, pliable crisps over the handle of a wooden spoon or a small inverted bowl immediately after they come out of the oven. They will harden into shape as they cool.
• For a super-fast single serving, make these in the microwave! Place small piles of cheese on a parchment-lined, microwave-safe plate and cook on high for 60-90 seconds, or until golden and bubbly.
• While best eaten fresh, you can store completely cooled crisps in an airtight container at room temperature for up to 2 days. A silica gel packet can help absorb moisture and maintain crispness.
FAQ
Q: What kind of cheese is best for making crisps
A: Hard, aged cheeses like sharp cheddar, Parmesan, Asiago, or Gruyère work best for creating a crispy texture. Avoid using soft cheeses as they contain too much moisture and will not crisp up properly.
Q: How do I store leftover cheese crisps
A: For best results, store completely cooled crisps in an airtight container at room temperature for up to 2 days. To maintain maximum crispness, you can add a food-safe silica gel packet to absorb any moisture.
Q: Why are my cheese crisps not getting crispy
A: Cheese crisps harden and become crispy as they cool. Be sure to let them rest on the baking sheet for a few minutes after taking them out of the oven. Using the wrong type of cheese, like a soft cheese, can also prevent them from crisping up.
Q: Can I make cheese crisps in the microwave
A: Yes, for a super-fast single serving, you can make these in the microwave. Place small piles of cheese on a parchment-lined, microwave-safe plate and cook on high for 60-90 seconds until golden and bubbly.
Pro Tips
- Drop the cheese in heaping tablespoons with at least 2 inches between mounds – they spread a lot, and crowding the pan fuses them into one giant crisp.
- Watch the last few minutes like a hawk: the crisps go from golden to burnt very quickly once the edges start to color.
- Try hard, aged cheeses like Parmesan, Asiago, or Gruyere for different flavors, but skip soft cheeses – they will never crisp properly.
- Drape the hot, pliable crisps over a wooden spoon handle or a small inverted bowl right out of the oven and they set into mini taco shells or edible bowls.
- For a single-serving shortcut, microwave small piles of cheese on a parchment-lined plate for 60-90 seconds; store cooled crisps airtight at room temperature up to 2 days, ideally with a silica gel packet to keep them crunchy.
Frequently Asked Questions
Can I make these cheese crisps in the microwave?
Yes – small piles of shredded cheese on a parchment-lined, microwave-safe plate take about 60-90 seconds on high, until golden and bubbly. It is the fastest route to a single serving.
Why are my cheese crisps soft instead of crispy?
They firm up only as they cool on the baking sheet, so give them a few minutes before lifting. If they soften in storage, a couple of minutes in a warm oven or the microwave restores the crunch.
Which cheeses work best?
Hard, aged cheeses like Parmesan, Asiago, or Gruyere all crisp beautifully. Soft cheeses have too much moisture and will not turn lacy and crunchy.
How do I store them?
Cool them completely, then keep them in an airtight container at room temperature for up to 2 days. A silica gel packet in the container helps absorb moisture.
Recipe card below.
More Recipes You’ll Love
- Creamy Instant Pot Broccoli with Bacon
- The Best 5-Minute Sugar-Free Ketchup
- Incredible 5-Minute Olive Tapenade

Easy Keto Cheese Crisps
Ingredients
Method
- Preheat your oven to 375°F / 190°C.
- Line a large baking sheet with parchment paper for easy cleanup. 2.
- Drop heaping tablespoons of the shredded cheese onto the prepared baking sheet, leaving at least 2 inches of space between each mound to allow for spreading. If using, sprinkle your favorite seasonings evenly over the cheese piles. 3.
- Bake for 12-14 minutes, or until the edges are golden brown and the centers are bubbly and set.
- Keep a close eye on them during the last few minutes as they can go from perfect to burnt very quickly! 4.
- Let the crisps cool on the baking sheet for a few minutes. They will become firm and crispy as they cool.
- Once cool, carefully lift them off the parchment paper and enjoy immediately for the best texture.
- While best eaten fresh, you can store completely cooled crisps in an airtight container at room temperature for up to 2 days. A silica gel packet can help absorb moisture and maintain crispness.