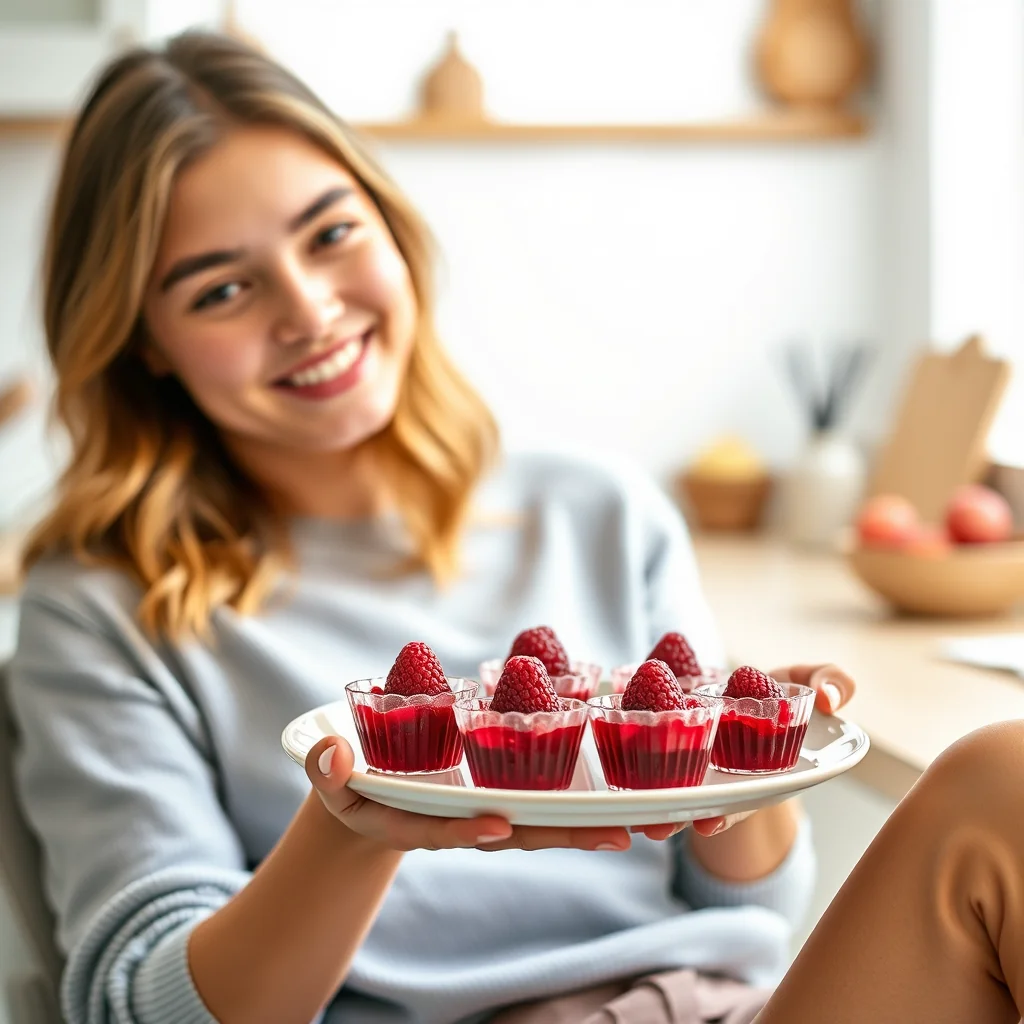
No-bake raspberry jelly cups tuck a bright raspberry jelly center inside a rich, creamy butter base — a little fruity surprise in every bite. They set in the fridge in under an hour and look far fancier than the ten minutes of work they take. Lovely with coffee or as a light dessert.
The Perfect No-Bake Treat to Use Up Your Gelatin!
Got a tub of gelatin in the pantry that you’re not sure what to do with? You’re not alone! While it’s packed with health benefits, gelatin can feel a bit tricky to use. Well, it’s time to dust off that container and give it a delicious new purpose with these incredibly simple, no-bake jelly cups! They feature a rich, creamy butter base with a bright, fruity raspberry jelly surprise in the center. These little treats are perfect for a healthy snack or a light dessert. And the best part? They’re totally customizable! Swap the raspberries for your favorite berry, or go for a decadent chocolate base instead. Let’s get making!
MAKES 16 jelly cups
PREP TIME: 10 minutes, plus 30 minutes to chill
COOK TIME: 5 minutes
Ingredients
• for Raspberry Jelly CupsFor the Butter Base
• ⅔ cup / 170 g (6 oz) coconut butter or smooth unsweetened nut or seed butter
• ⅔ cup / 145 g (5.1 oz) coconut oil, ghee, or cacao butter, melted
• 2 teaspoons (10 ml / 0.3 fl oz) vanilla extract
• 7 drops liquid stevia, or 2 teaspoons (10 ml / 0.3 fl oz) confectioners’-style erythritol
• For the Jelly Filling
• ½ cup / 70 g (2.47 oz) fresh raspberries
• ¼ cup / 60 ml water
• 3 drops liquid stevia, or 1 teaspoon confectioners’-style erythritol
• 1½ teaspoons unflavored gelatin
• Special Equipment
• 16 mini muffin cup liners or 1 silicone mini muffin pan
Instructions
1. How to Make Jelly Cups
2. Prepare your pan. Arrange 16 mini muffin cup liners on a tray or have your silicone mini muffin pan ready.
3. Mix the base. In a medium bowl, stir together the coconut butter, melted oil, vanilla, and sweetener until smooth and well combined.
4. Create the first layer. Spoon half of the base mixture evenly into the 16 muffin cups, filling each about one-quarter of the way. Place the tray in the fridge to chill while you prepare the filling. Set the remaining base mixture aside at room temperature.
5. Make the jelly filling. In a small saucepan, bring the raspberries, water, and sweetener to a simmer over medium heat. Let it simmer for 5 minutes. Remove from the heat, sprinkle the gelatin over the top, and mash everything together with a fork.
6. Chill the jelly. Transfer the jelly mixture to the fridge to set for about 15 minutes, or until it’s firm enough to handle.
7. Assemble the cups. Remove the chilled bases and the jelly from the fridge. Scoop the jelly with a ½-teaspoon measure, roll it into a small ball, and flatten it into a disc. Press one jelly disc into the center of each chilled butter base.
8. Add the top layer. Spoon the remaining butter base mixture over the jelly discs, covering them completely.
9. Final chill. Return the cups to the fridge for at least 15 more minutes to set completely before serving.
Nutritional Information
• Nutrition Facts
• Per serving, made with coconut butter and coconut oil
• Calories: 151
• Total Fat: 15.1 g
• Saturated Fat: 13.2 g
• Cholesterol: 0 mg
• Sodium: 4 mg
• Carbohydrates: 2.9 g
• Dietary Fiber: 1.9 g
• Net Carbs: 1 g (0.04 oz)
• Sugars: 0.9 g
• Protein: 0.9 g
• Macros
• Fat: 90%
• Carbs: 8%
• Protein: 2%
Pro Tips
• Tips and Variations
• Store these jelly cups in an airtight container in the fridge for up to 5 days.
• For a decadent twist, swap the butter base for 7½ ounces / 200 g (7.1 oz) of melted stevia-sweetened baking chocolate.
• Feel free to experiment with the filling! Swap the raspberries for any fresh berry you love, like strawberries, blueberries, or blackberries.
• Easily adapt this recipe for different diets! Use coconut butter for AIP/Nut-Free, or almond/sunflower seed butter for Coconut-Free. Opt for coconut oil or cacao butter to keep it dairy-free.
FAQ
Q: Can I use a different fruit for the jelly filling
A: Yes, you can easily swap the raspberries for other fresh berries like strawberries, blueberries, or blackberries to create different flavors.
Q: How should I store these no-bake jelly cups
A: These jelly cups should be stored in an airtight container in the refrigerator. They will stay fresh for up to 5 days.
Q: Is there a dairy-free or nut-free option for this recipe
A: Absolutely. To make this recipe nut-free, use coconut butter for the base. For a dairy-free version, use coconut oil or cacao butter instead of ghee.
Q: Can I make a chocolate version of these jelly cups
A: Yes, for a decadent chocolate variation, you can replace the butter base with 7½ ounces (200 g / 7.1 oz) of melted stevia-sweetened baking chocolate.
Pro Tips
- Chill the bottom butter layer before adding the jelly — a firm base keeps the jelly disc from sinking to the bottom.
- Let the jelly filling set until firm enough to handle, then roll it into small balls and flatten them into discs for a clean, centered jelly pocket in each cup.
- For a decadent twist, swap the butter base for 7½ oz / 200 g of melted stevia-sweetened baking chocolate.
- Feel free to swap the raspberries for any fresh berry you love — strawberries, blueberries, or blackberries all work in the jelly filling.
- Store the finished cups in an airtight container in the fridge for up to 5 days.
Frequently Asked Questions
Can I make these jelly cups ahead of time?
Yes — they keep for up to 5 days in an airtight container in the fridge, and the layers stay clean and distinct.
Do I need special equipment?
Just 16 mini muffin cup liners or one silicone mini muffin pan. Everything else is no-bake mixing and chilling.
Can I use a different berry for the jelly filling?
Yes — replace the raspberries with strawberries, blueberries, or blackberries. The simmer-and-gelatin method stays exactly the same.
Are these raspberry jelly cups keto-friendly?
Each cup has 2.9 g carbs (1 g net), 15.1 g fat, and 0.9 g protein — about 90% of the calories come from fat.
Recipe card below.
More Recipes You’ll Love
- 10-Minute Creamy Mushroom Gorgonzola Sauce
- Pesto Pepperoni & Olive Bites (Keto Fat Bombs)
- Easy 20-Minute Keto Tomato Sauce
No-Bake Raspberry Jelly Cups
Ingredients
Method
- How to Make Jelly Cups
- Prepare your pan.
- Arrange 16 mini muffin cup liners on a tray or have your silicone mini muffin pan ready.
- Mix the base.
- In a medium bowl, stir together the coconut butter, melted oil, vanilla, and sweetener until smooth and well combined.
- Create the first layer. Spoon half of the base mixture evenly into the 16 muffin cups, filling each about one-quarter of the way.
- Place the tray in the fridge to chill while you prepare the filling.
- Set the remaining base mixture aside at room temperature.
- Make the jelly filling.
- In a small saucepan, bring the raspberries, water, and sweetener to a simmer over medium heat.
- Let it simmer for 5 minutes.
- Remove from the heat, sprinkle the gelatin over the top, and mash everything together with a fork.
- Chill the jelly.
- Transfer the jelly mixture to the fridge to set for about 15 minutes, or until it's firm enough to handle.
- Assemble the cups.
- Remove the chilled bases and the jelly from the fridge. Scoop the jelly with a ½-teaspoon measure, roll it into a small ball, and flatten it into a disc. Press one jelly disc into the center of each chilled butter base.
- Add the top layer. Spoon the remaining butter base mixture over the jelly discs, covering them completely.
- Final chill. Return the cups to the fridge for at least 15 more minutes to set completely before serving.